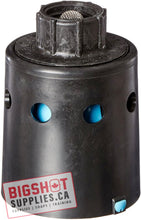
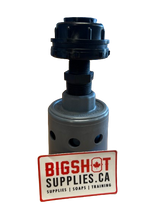
Hudson Float Valve
- No external moving parts to break
- Made of Plastic, Nylon and Rubber
- 1” FPT Inlet handles up to 40GPM
- 175˚ F Max
- Use a reducing bushing to match your specific plumbing diameter
No bulky lever arm and ball. The unique patented design of the Hudson Valve uses water pressure, as opposed to a lever arm and ball, as the force to close the valve. This compact, self-contained design greatly enhances the valve’s versatility and reliability. The small compact size of the valve means that it is easy to hide in applications where aesthetics matter and it can fit into tight spaces.
To set up your Hudson to a tank you will need a Bulkhead and a Reducing Nipple.
Make sure that your inlet tubing/pipe is of an adequate size:
• For the 1” Valve – no smaller than ½” and no bigger than 2”
How To Use Properly:
• Do not use pipe compound
• Use plumber’s Teflon tape on threads of inlet water supply only
• Screw Hudson Valve on to inlet water supply pipe, then hand tighten only (you should be able to put your mouth to the hole and blow air through it with only minimal resistance)
• Turn water source on full volume
• Make sure valve is mounted stably – the valve will not work if it is not secure
• The valve cannot be submerged
• The valve must be mounted vertically
- The valve needs to be cleaned periodically depending on the cleanliness of the water source.
- Wash the valve and valve parts with fresh water. Dirt, rust, sediment and sand can build up on the valve and cause it to malfunction.
- The valve has two very important holes that run through the center of it. If either of these holes becomes clogged, the valve will not shut off.
To check the holes take the valve apart:
- Remove the strainer cap from the stem of the diaphragm.

- Hold the diaphragm up to the light and make sure that the hole that runs through the body of the stem is free and clear.

- Drop the float out of the body of the valve. To do this, remove the retaining screw at the bottom of the valve.
- Hold the body up to the light and make sure that the hole that runs through the body of the valve is free and clear.

- If either of these holes is clogged, flush it out with water or use a small needle to help clear the hole. Do not force any object into either hole, as the valve will not work if the size of the hole is altered.
- Check to make sure that you have adequate flow. The valve has to have more than a trickle of water coming to it in order to get it to shut off. If you have less than 10lbs of water pressure, your valve may not be getting enough flow to it to make the valve seal.
- Make sure that your water source is turned on full volume.
- Make sure that your tubing/pipe is of an adequate size:
- For the ½” Valve – no smaller than ¼” and no bigger than 1”
- For the 1” Valve – no smaller than ½” and no bigger than 2”
- Make sure that all parts are installed correctly.
- The screen is installed from the top of the cap down.

- The diaphragm “skirt” sits in the groves of the body of the valve.

- The retainer ring sits on top of the diaphragm, with the flat side up.

- The float has free movement in the body of the valve (using your fingers, gently push the float up and let it drop back down – it should move up and down freely about an 1/8”.
- The screen is installed from the top of the cap down.
- Do not glue any parts together
- Use Teflon tape only – do not use other products to install valve.
- If you are using a ½” valve, try removing the screen. Due to the fact that there is less area in the ½” valve between the cap and the diaphragm than there is in the 1” valve, the screen on the ½” sometimes will restrict the movement of the diaphragm. Not using a screen will not affect the performance of the valve. The screen is only needed to help filter out debris. If your water source is clean, it is not needed.
SKU: 2240


